3 Steps to Rehabilitate your Achilles Tendinopathy
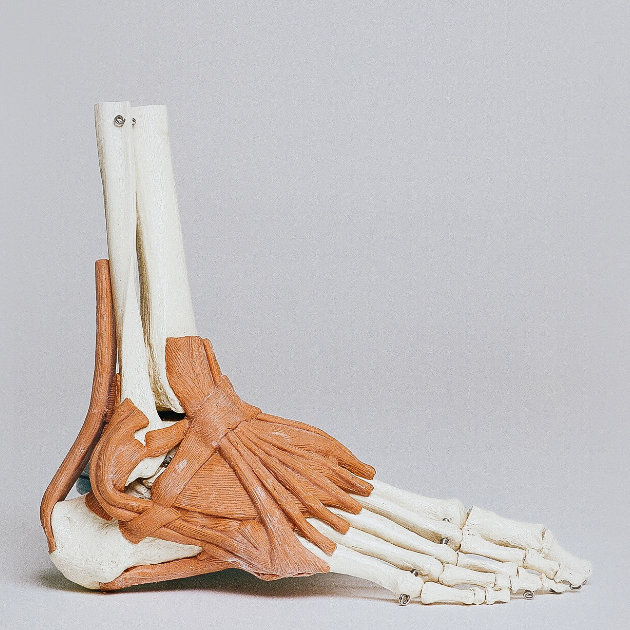
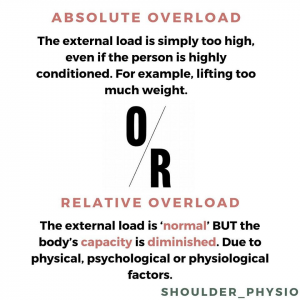
Tendons are specialised connective tissue structures that transfer force from your muscles onto your muscles to your bones (1). The achilles tendon has two important functions – shock absorption and energy storage (1). Achilles Tendinopathy (AT) is an injury that can present due absolute overload, relative overload or a mixture of the two (1, 2).
This overload overtime causes pathological changes within the tendon that usually results in pain or discomfort for the individual. There are two locations for this to occur:
- Mid-portion achilles tendinopathy (2-6cm from the heel)
- Insertional achilles tendinopathy (less than 2cm from the heel)
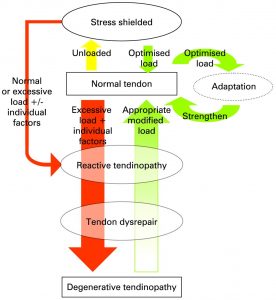
The transition of a tendon from normal to painful has been described by Cook and Purdam as a continuum involving 3 stages:
- Reactive tendinopathy
- Tendon dysrepair
- Degenerative tendinopathy
The assessment should also rule out other causes for pain within the area. These other diagnosis include:
- Sural nerve irritation or neuroma
- Peroneal tendon subluxation or dislocation
- Trigonum syndrome
- Seronegative arthroplasties
- Invaginated plantaris tendon
Following the assessment by your health profession – the type of AT that is present and which stage it is in should be determined as this will guide the rehabilitation (1).
Rehabilitating Achilles Tendinopathy
Once correctly diagnosed, the rehabilitation of AT must be designed appropriately for the individual and their sporting or physical activity goals (1). The program must also contain 2 essential elements:
- Regular increases in weight/resistance to progressively load the muscle/tendon (low reps + high load)
- Increases of speed and/or reps to increase the load on the tendon itself
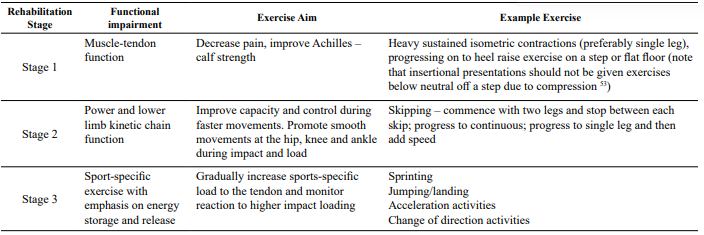
Kountouris and Cook (2015) described the progressive loading program for AT to be in 3 stages.
 (1)
(1)
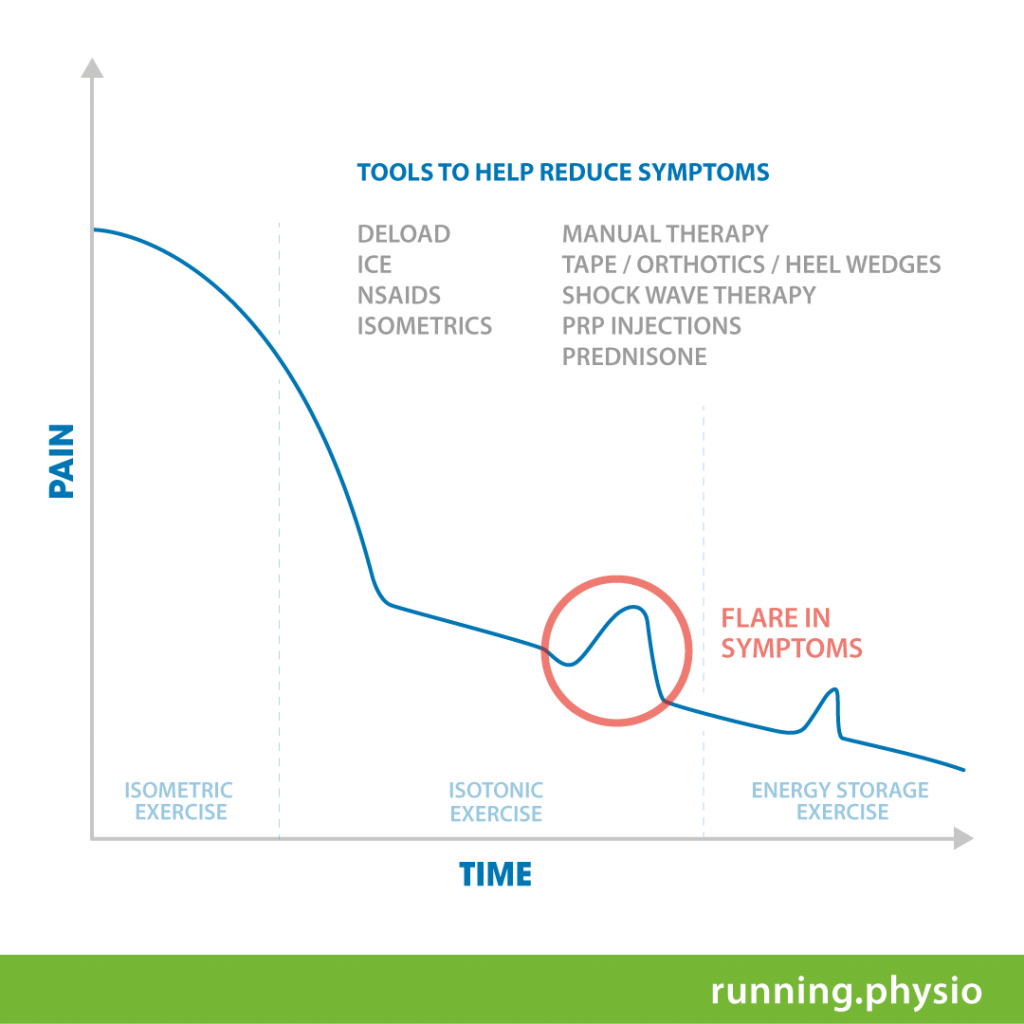
While the tendon is reactive – there are many tools that can be used to help reduce the symptoms and allow the progressive loading program to be more tolerable or to start sooner. These tools are listed in the graph below (note: this list is not exhaustive).
Step 1
Isometrics Isometric exercise has been shown to reduce symptoms in a reactive tendon, while also allowing some strength and conditioning to occur and addressing some potential deficits that may have led to the injury occurring. If the tendon is sore when performing the isometric exercise it is advised to work in mid-range (i.e not heels not all the way up or all the way down)(1). This will help reduce the pressure on the tendon (1). During this phase, relative rest from high tendon loading activities such as running should be used.
- Soleus wall hold SL – mid range
- SL calf raise holds – mid range
- SL calf raise holds with weight
Step 2
Isotonics Once the tendon is no longer as irritable as it was initially, or if the individual is in the tendon dysrepair or degenerative tendon phases – a progressively higher load is required to stimulate cell response and address functional deficits (1). It is likely that starting isotonics with mid range “pulses’ may be more tolerable than jumping straight to full range. Progress the pulses to full range from floor, then full range off a step.
- Pulses SL calf, soleus (mid range)
- SL calf raise
- SL bent knee calf raise
It is also important to note that despite me using a kettlebell – both isotonic and isometric loading can also be done in a smith rack machine and/or leg press machine and is recommended when progressing your load.
Step 3
Energy storage and release The last step of rehabilitating an AT involves returning the tendon to the high loads it will be put under when returning to their sport or physical activity (1). This high load is “energy storage and release”. Once these exercises match those required for their rehab goals and no longer cause any immediate or latent pain – then the AT has completed its rehabilitation (1).
- Skipping or hopping
- DL hops forward
- SL hops forward
- Acceleration
- Change of direction
Summary of AT rehabilitation
As per (1), physiotherapy for an injury such as AT should involve the following:
- Planned loaded intervention
- Tailored to each person’s presentation
- Avoid recipe programs
- Patience of, and education for the individual is essential
- Referral to other interventions be only considered after a failure to progress following a period of conservative management

Alec Lablache
POGO Physiotherapist
Featured in the Top 50 Physical Therapy Blog
Book an Appointment with Alec here.
References:
- Ganderton, C., Cook, J., Docking, S., Rio, E., van Ark, M., & Gaida, J. (2015). Achilles tendinopathy: Understanding the key concepts to improve clinical management. Australasian Musculoskeletal Medicine, 19(2), 12-18.
- Jared Powell (2019). Absolute overload and relative overload. Retrieved from https://www.jaredphysio.com/
- Peter Malliaras. (2016). Key factors to consider in Achilles tendinopathy rehab. Tendinopathy Rehabilitation. Retrieved from https://www.tendinopathyrehab.com/blog/tendinopathy-updates/key-factors-to-consider-in-achilles-tendinopathy-rehab
- Brad Beer. (2019). Tendinopathy Rehabilitation: Current Concepts. POGO Physio. Retrieved from https://www.pogophysio.com.au/blog/tendinopathy-rehabilitation-current-concepts/